-
SECTION 7
Crossings
Fencing off your riparian areas offers the opportunity to rethink how and where your stock cross the waterway in relation to your whole farm plan. Crossings can be expensive to build, and the safety and environmental consequences need to be considered. It is worth getting advice about location and design before beginning any work.
This section contains some general information for designing and building the three most common types of farm crossings:
- culverts,
- bridges, and
- bed-level crossings.
A well-sited crossing will quickly become a valuable asset, helping you to manage your property more efficiently as well as protecting waterway health.


Choosing the best type of crossing for your farm
Your crossing must not obstruct or alter the natural size and flow of your waterway. The best type of crossing for your situation will depend on a number of factors including:
- the shape and size of your waterway.
- water volume.
- how often it will be used.
- volume and type of traffic.
- whether you need all-weather access.
- soil type.
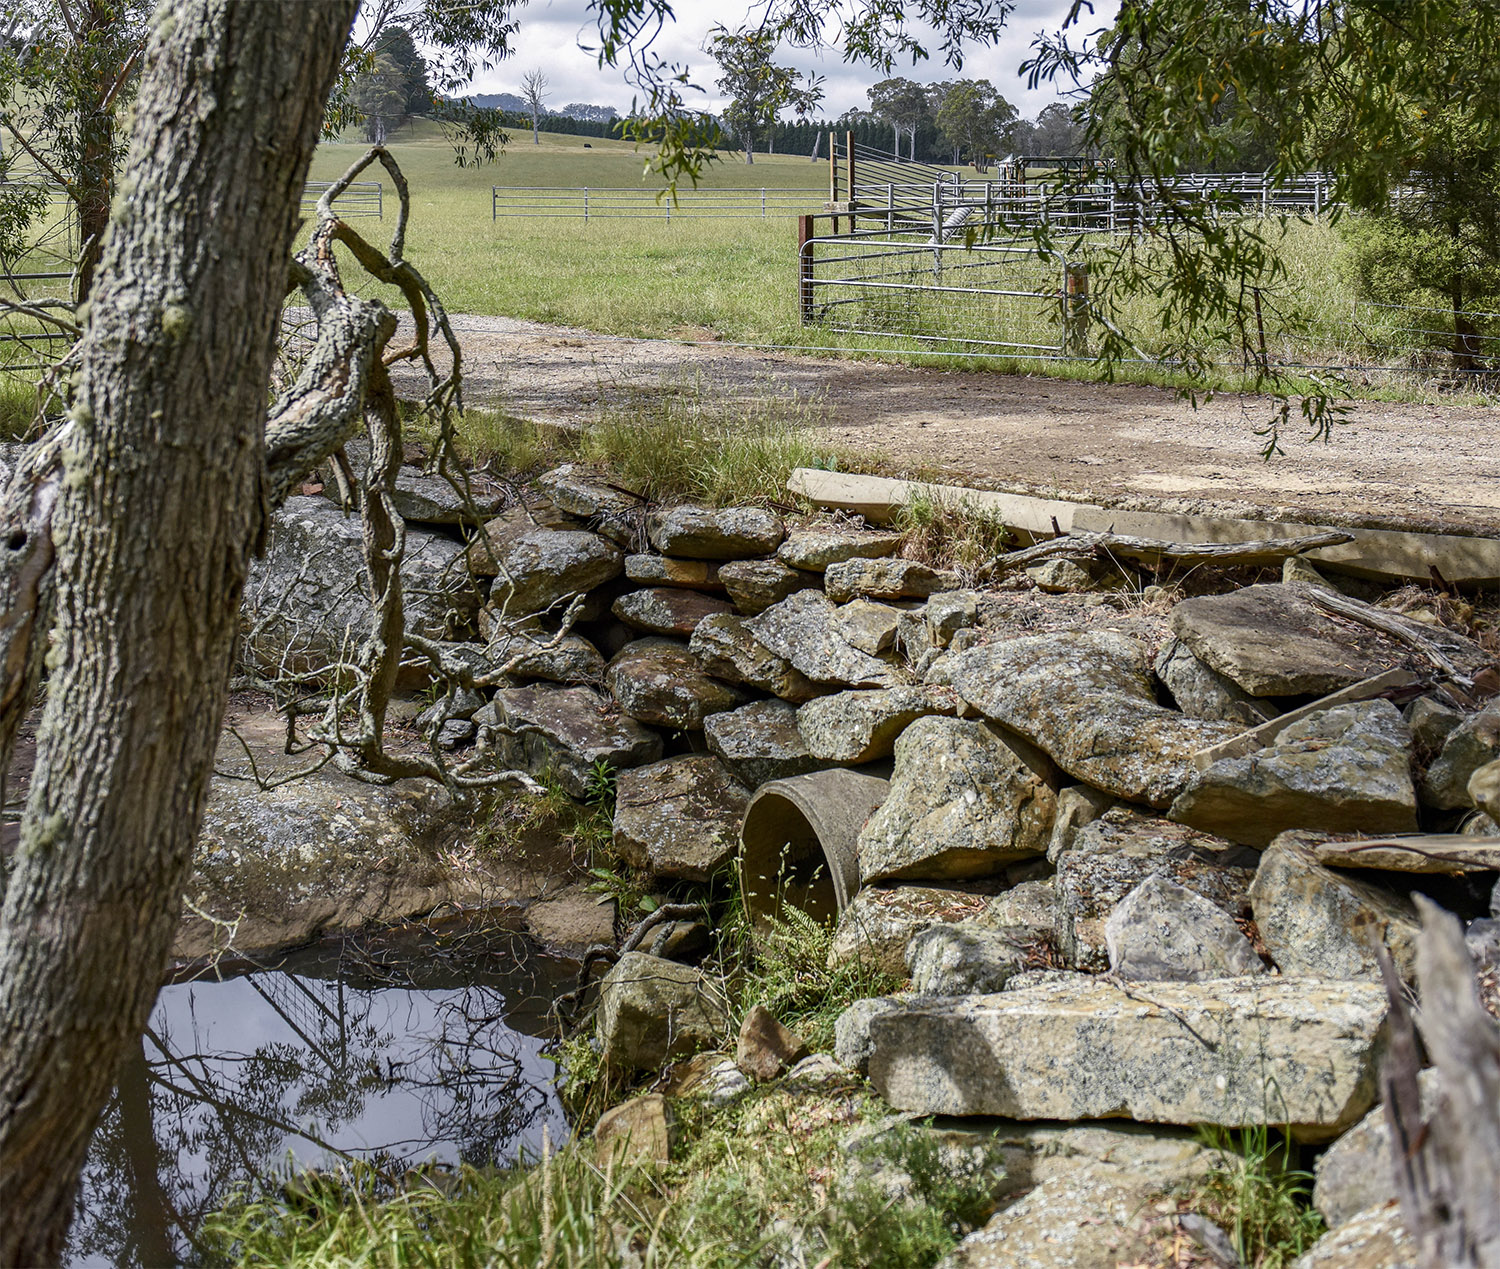
Culverts
Culverts are raised crossings that use round or square pipes to allow water to flow underneath. They are relatively simple to construct and are suitable for permanent waterways that flood infrequently. The pipes should be large enough that if a flood occurs, water will pass over and around the crossing gently and maintain an even depth across its width. They are not suitable for waterways that carry heavy sediment loads as they can get blocked up.
Obstructing the water flow, or significantly altering the slope of the banks, size of the channel, or level of the bed will damage your waterway and may weaken your crossing.

When building a culvert:
- the bottom of the culvert should be no higher than 50mm above the level of the bed. This avoids water pooling and stagnating at the inlet and reduces the impact of water falling and causing erosion at the outlet. It also makes it easier for fish and other aquatic animals to move through the crossing.
- square pipes (ie box culverts) are better than round pipes for fast-flowing waterways because they disperse water, reducing its velocity and the risk of erosion at the outlet.
- the slope of the pipe(s) must match the slope of the waterway bed to avoid the risk of bed erosion.
- use a compactible backfill that will not wash away. Gravel should be no more than 40mm in diameter. Clay or cement can be included into the mix to improve erosion resistance.
- flare the banks to guide the water through the culvert and away from the banks.
- maintain protective vegetation on the banks.
- follow the principles for flood-resistant fencing to prevent stock straying from the crossing into your waterway.
- protect the full height of the banks with rocks or gabions (wire mesh baskets containing rocks).
Remember to factor in summer conditions, particularly the potential for extended periods of hot, dry weather, and your future farm plans when calculating your water needs.


Bridges
Bridges span the entire width of the waterway. They are the best type of crossing for waterways that are deep or prone to flooding. When building a bridge:
- ensure the bridge is strong enough to support the maximum load.
- ensure that the banks are well supported and protected, without reducing the width of the channel.
- the supports must be strong enough to withstand the impact of flood water and debris, but designed so they do not restrict water flow.
- retain as much vegetation as possible alongside your crossing to stabilise the banks and prevent erosion.
Check the structural integrity of your bridge regularly, especially after heavy rain events.

Bed-level crossings
The cheapest and easiest types of crossings to build and maintain are bed-level crossings. They are built at a shallow part of a waterway and provide a firm surface for crossing, while at the same time allowing water to flow across that surface. They are most suitable for waterways that flow infrequently, or only experience low flows such as drainage lines or small streams.
Bed-level crossings can be built using a variety of materials but rock has the advantage that it provides a firm footing and also deters stock from lingering on the crossing. When building a bed-level crossing:
- stabilise the bed using a coarse, compactible material. (If the bed is boggy, consider using a layer of geotextile fabric and backfilling it with a compactible material).
- keep the crossing as low as possible (ideally, less than 300mm high).
- the gradient on the upstream side of the ramp should be no steeper than 1:4.
- the downstream slope of the crossing should not exceed 10;1 (20:1 is preferred to allow fish passage).
- protect the bed and banks with rocks (a range of interlocking sizes will minimise movement).
- extend the protective layer of rock running up the banks to above the flood level.
Bed-level crossings are most suitable for waterways that flow infrequently, or only experience low flows.
When building a crossing:
- choose a straight section of the waterway. This is because the force of the water is directed down the middle of the waterway, rather than towards a bank. You will reduce the risk of your crossing deflecting water towards the bank and causing erosion.
- select a site after a bend, not before. This is because water flow tends to accelerate around the outside of a bend. The force of the water removes sediment from the outside bank (erosion) and deposits it on the inside bank, making both sides of the waterway unstable for construction.
- build your crossing straight across the waterway. If the crossing is built at an angle, water flow will be concentrated on small area, potentially weakening it. The crossing may also direct water towards the bank and cause erosion.
Building a crossing is a ‘controlled activity’ under the Water Management Act 2000. Check whether you need a permit before carrying out any work.

- higher is better. Choosing a naturally higher site in the bed of your waterway will save time and money because it reduces the height to which you need to build your crossing. It also reduces the crossing’s exposure to the force of the water, making it more flood resistant.
- make certain the site has a firm footing and avoid areas that are boggy, eroded or degraded. You may need to excavate and reinforce the base with rock or concrete to ensure your crossing is sitting on stable ground.
- discourage stock from lingering at the crossing by choosing a site with little or no shelter, and using rock on the surface;
avoid steep slopes. The slope of your banks should not exceed 4:1 otherwise you run the risk of erosion caused by fast moving water making its way towards the waterway. - choose a narrow part of the waterway. Provided the site meets all other requirements, It will generally be easier and cheaper to build a crossing over a short stretch of waterway than a wider stretch.
- make sure your entry and exit points encourage stock movement. To encourage them to use the crossing calmly and willingly, ensure the exit point is clearly visible some time before the entry point, and use angled fencing to channel them on and off the crossing.
Studies have shown that cattle release up to 50 times more effluent when standing or walking in water than when on dry land. Building a crossing that prevents them getting their feet wet is one of the best things you can do for waterway health.

PUTTING IT INTO PRACTICE: JANE AND GRANT’S STORY
Protecting the creek that bisects their 400 acre property has transformed the way the Sherborne family manages its 320 cow dairy herd.
Integral to the transformation are several crossings that link both sides of the farm and connect to a state-of-the-art laneway system. Benefits include faster trips to and from the milking shed, less stress on the cows’ hooves, and the ability to rotationally graze every paddock.
“The laneways and crossings have opened up the whole farm.”
Jane and Grant Sherborne are regarded as leaders in the New South Wales dairy industry, and are well-known for implementing best practice in their business.
It’s no surprise, then, that they began protecting the riparian land on their Southern Highlands property as far back as 2006.
Initially, they fenced off both sides of Wild Meadows Creek in response to a local initiative to protect remnant rainforest. Later, they worked with WaterNSW (as it is now known) to develop infrastructure to improve water quality throughout the Sydney catchment.
Jane and Grant could see very clear benefits to their business of fencing off the creek. “The cows were always getting lost in the bush and it was extremely time-consuming searching for them,” says Grant. “They were also making a mess of the banks so erosion was an issue in some places.”
A prerequisite to fencing the creek was that it would remove access to a number of crossing points, and require the installation of a watering system.
Jane and Grant saw this as opportunity to re-think the way they moved stock, water and nutrients around the property. Working from a whole-farm plan, they examined their existing paddock layout and saw where they could make improvements.
Goals included access to all paddocks, regardless of which side of the creek they were on, easy travel to the dairy shed, and being able to use the nutrient-rich effluent collected from the shed to irrigate their pasture.
Integral to their plans was linking both sides of the property, which would involve building crossings and some new laneway.
Issues that needed to be considered before they started building were that Wild Meadow Creek can flow very quickly, and even flood after heavy rain, and the large size of the herd which could potentially use a crossing twice a day.
With specialist help and funding, they constructed a 5m wide box culvert for all-weather, heavy traffic, and four bed-level crossings with a concrete base for less frequent use. Each crossing is fenced with plain electric wire which is easy to replace if damaged by flood.
The laneway was extended and upgraded. Because of the risk of run-off, it was built to road-standard. It also features rubber belting underlay and a stable, coal-dust surface which are soft on hooves.
“The laneway and crossings have improved the overall subdivision and opened up the whole farm,” says Grant. “They’ve helped with moving the cattle around, and mean that we can now access all our paddocks and keep our rotations in-sync.”
 sml")


 sml")
Download a PDF copy of Section 7: Crossings.
Fill in the form below and we’ll send you a digital copy.

We have incentives available for managing stock around waterways on your farm…
Through our Rivers of Carbon program we can help you manage stock around waterways. We will visit your property and work with you to develop a plan for your waterway that may involve fencing, off-stream water, small-scale erosion works, and re-vegetation.
Once we have an agreement in place on what we want to achieve together, we generally cover at least half of the costs involved in implementing the agreement. Click the button below to learn more about our program:

This website is a collaborative project between:
